








 Flashlight
 Solar
Extension Cable
Solar
Extension Cable


Portable Power Station for Starlink: Runtime, Solar and Off-Grid Setup
A portable power station for Starlink has to satisfy two separate requirements, not one: enough output to run the hardware, and enough stored energy to hold the runtime you need. Those are different numbers. Buyers who check only one of them are the ones who lose the connection at two in the morning.
Starlink does not draw much continuous power. Published figures put the smallest terminal in the 20W to 40W band and the highest-performance units near 150W. Runtime is therefore an energy problem rather than an inverter problem, which changes what you should be shopping for.
What follows is a sizing sequence, not a shopping list. Identify your hardware, measure the real load, convert to usable watt-hours, choose the connection path, then size the recharge so the system balances across the days you plan to be out.
Quick Answer: How Do You Size a Portable Power Station for Starlink?
Start from the load, not the battery. Multiply your total average watts by the hours you need to stay online, then divide by 0.85 to cover conversion and control losses. The result is the nameplate capacity to shop for.
Required capacity in watt-hours is roughly the average total watts multiplied by required hours, divided by 0.85.
Three figures decide whether a unit works for you.
- Output rating: the continuous watts the AC or DC port can supply, with headroom for the brief startup peak.
- Stored energy: nameplate watt-hours, which sets runtime once the derate is applied.
- Recharge rate: the watts you can put back each day, which decides whether the system survives past one battery cycle.
Treat every result as a planning estimate. Consumption shifts with temperature, obstructions, device count, and firmware, so no calculated runtime is a guarantee.
Start With Your Starlink Power Requirement, Not a Battery Size
Different Starlink hardware cannot share one assumed wattage. The spread between lowest and highest draw is roughly six to one, which at the same runtime target is the difference between a 500Wh unit and a 5,000Wh one.
Identify Your Starlink Hardware
Starlink publishes average and idle consumption for each model in its own support material. Those ranges are the right planning input because they cover the antenna, router, power supply, and cabling rather than the dish alone.

[IMAGE: Alt: Starlink hardware power consumption comparison for sizing a portable power station for Starlink | 16:9]
|
Starlink hardware |
Average in use |
Idle |
24-hour active energy |
|
Mini |
20W to 40W |
15W |
480Wh to 960Wh |
|
Standard Actuated |
50W to 75W |
20W |
1,200Wh to 1,800Wh |
|
Standard, current generation |
75W to 100W |
20W |
1,800Wh to 2,400Wh |
|
Performance |
110W to 150W |
45W |
2,640Wh to 3,600Wh |
Actual draw can change with hardware revision, temperature, network activity, and software. Use Starlink's current published range for initial sizing, then treat any lower measured draw as extra headroom rather than guaranteed capacity.
Measure Normal Draw and Short-Term Peaks
Average operating watts and peak watts are separate numbers, and only one of them appears in runtime math. The Starlink app reports live consumption. An inline power meter on the AC or DC feed gives the same reading independently.
Boot behavior is where marginal power sources fail. Reported startup peaks on the Mini reach about 60W against a steady 20W to 40W draw. A source that cannot deliver that peak will fault with plenty of charge still showing.
Count Every Device Sharing the Battery
The real load is the whole working setup. Add everything plugged in at the same time.
- Laptop under load: 45W to 65W, higher on video calls.
- Phone and tablet charging: 10W to 25W combined.
- Separate router or mesh node: 10W to 20W continuous.
- Lights, fan, camera batteries: variable, and easy to forget.
A Mini plus a laptop is roughly three times the Mini alone. Size the battery for that total, then confirm the same total sits comfortably inside the output rating.
How Long Will a Portable Power Station Run Starlink?
Work in watt-hours, not battery percentage. Watt-hours describe how much energy is stored. Watts describe how fast it can leave. Starlink barely stresses the second number and always stresses the first.
Energy needed equals average watts multiplied by operating hours. A percentage on the display cannot substitute, because the same percentage is wildly different energy on a 512Wh unit and a 5,120Wh one.
Apply the Usable-Energy Derate
Nameplate watt-hours divided by load is not runtime. AC inversion, DC conversion, standby electronics, cable resistance, temperature, and battery protection thresholds each take a share of the total.
We use 0.85 as the planning multiplier across all capacities. A 2,048Wh unit therefore plans as roughly 1,740Wh of deliverable energy. The general method behind this, including inverter efficiency and recharge timing, is covered in our portable power station calculator guide.
|
Nameplate capacity |
Usable at 0.85 |
At 25W (Mini) |
At 75W (Standard) |
At 130W (Performance) |
|
512Wh |
435Wh |
About 17 hours |
About 6 hours |
About 3 hours |
|
1,024Wh |
870Wh |
About 35 hours |
About 12 hours |
About 7 hours |
|
2,048Wh |
1,741Wh |
About 69 hours |
About 23 hours |
About 13 hours |
|
4,096Wh |
3,482Wh |
About 139 hours |
About 46 hours |
About 27 hours |
|
5,120Wh |
4,352Wh |
About 174 hours |
About 58 hours |
About 33 hours |
Then add reserve. Build in margin whenever the connection carries work, medical or emergency weight. Twenty to thirty percent above the calculated figure is a reasonable default. Cold nights, a blocked horizon, and a heavier work day than planned all land on the same battery.
Which Battery Capacity Matches Your Required Runtime?
Four use cases cover most buyers. Match the one for your worst realistic day, not your typical one.
Short Outages and Brief Sessions
A few hours online during a neighborhood outage, or an evening at a campsite, is a light energy job. Portability matters more here than reserve.
A 512Wh class unit covers it on paper, and that figure is the honest floor for this use case. In the current lineup, the smallest station we would put on a Starlink job is the P1000 Plus at 1,024Wh, which buys headroom rather than matching the floor exactly. It runs 1,800W continuous and weighs 26.5 lb.
A Full Remote-Work Day
Nine hours online with a laptop is the case most buyers actually have. Mini at 25W, laptop at 45W, phone and accessories at 10W puts the working total near 80W. Nine hours of that is 720Wh delivered, which needs roughly 850Wh of nameplate capacity once the derate is applied.
That is why 512Wh units come up short here despite looking adequate on the dish figure alone. The P1000 Plus is a minimum-fit option at 1,024Wh and 1,800W continuous, with a 500W solar input window. Derated, that is about 870Wh against an 850Wh requirement. Its USB-C provision is one 100W PD port plus one 20W port, so decide which device gets the 100W path before planning an inverter-free setup. That estimate sits close to the base load only; move to 2,048Wh or more when you need a 20 to 30 percent reserve, winter margin, or additional devices.

[IMAGE: Alt: Portable power station for Starlink running a dish, laptop and phone during a remote work day | 4:3]
Overnight and 24-Hour Operation
Continuous operation is a daily energy budget, not a battery size. A Mini running 24 hours at a 25W average consumes about 600Wh. A current-generation Standard terminal at 75W consumes about 1,800Wh, three times as much.
At 2,048Wh nameplate, you get roughly 23 hours of continuous Standard operation, so one full day with no margin. The BP2000 sits at that capacity with 2,200W continuous output, a 1,000W solar input window and a 1,800W AC input that reaches 80 percent in about 1.5 hours when grid power is available.
Multi-Day Off-Grid Use
Past one battery cycle, recharge capability matters as much as capacity. A very large battery delays the problem rather than removing it. Two paths open up here.
- Expand storage. The BP2000 accepts up to seven B2000 packs in parallel for a maximum of 16,384Wh, so you can start at one day of reserve and scale later rather than buying for an untested worst case.
- Move up a tier. For a fixed base camp running a higher-draw terminal continuously, larger fixed capacity is simpler than a stack of packs.
The P5000 Pro covers the second path at 5,120Wh and 3,600W continuous, rated for 5,000 cycles to 80 percent. That is roughly 58 hours of Standard operation, or about 33 hours at a 130W Performance draw, before any solar.
An expandable system fits demand that may grow or change, while a larger fixed-capacity unit fits a stable installation where mobility is not important. Choose between them from the load plan, recharge window, and handling requirements.
Should You Power Starlink Over AC, DC, or USB-C?
The AC Path Is the Compatibility Default
Plug the supplied Starlink power supply into an AC outlet on the station. It works, it is manufacturer-supported, and it needs no research.
The cost is inverter overhead. The station converts DC to AC, the Starlink supply converts it back, and each stage loses a percentage. The inverter also draws idle power whenever it is on. Against a 25W load, that is a meaningful share of consumption, not a rounding error.
Consider DC or USB-C Only Where the Hardware Supports It
Where Starlink documents a direct DC or USB-C Power Delivery input for your model, using it can avoid an AC conversion stage and reduce inverter overhead. The exact runtime gain depends on the terminal, cable, negotiated power profile, and the station's own DC efficiency, so treat it as a measured advantage rather than a fixed percentage.
Requirements are strict. Voltage has to sit inside the documented window, current has to be adequate, and a Power Delivery source has to negotiate the profile the terminal expects rather than merely fit the plug. Confirm this in Starlink's own documentation for your model before buying cables.
Avoid Unverified Adapters and Wiring Changes
A connector fitting is not the same as a connector being compatible. Voltage, current, and polarity all have to match, and an identical-looking barrel jack can carry the wrong voltage.
Do not modify Starlink hardware, bypass protection circuits, or splice into the supplied cable. Use the documented power path and accessories. Efficiency gained from an improvised setup is not worth the terminal.
How Much Solar Do You Need to Keep Starlink Running?
Solar does not create indefinite runtime. It replaces watt-hours at a variable rate, and the only question is whether daily replacement matches daily consumption.
Calculate the Daily Energy Deficit First
Daily solar yield in watt-hours is roughly panel watts times peak sun hours times about 0.75 for system losses. Compare that against daily consumption and the answer falls out.
Two cases make the point. A 200W panel at four peak sun hours yields about 600Wh, which exactly matches a Mini running 24 hours at 25W. Break-even with zero margin, so one overcast day puts the system into deficit.
A 400W panel at the same four hours yields about 1,200Wh against a Standard terminal's 1,800Wh daily need, leaving a 600Wh shortfall. Two panels take yield to roughly 2,400Wh and turn the day net positive.
Account for Real Solar Conditions
Rated panel watts describe output under laboratory test conditions, not what you collect in the field. The EIA notes that available solar resource varies by region and season, and that a fixed panel gathers less than one that tracks the sun.
Clouds, haze, shade from a single branch, panel temperature and cable length all subtract. Winter daylight at the same site can be half the summer figure. Our guide to solar output on cloudy days covers what actually happens to production when the sky closes in.
Match the Array to the Power Station's Solar Input
Wattage is not the only compatibility figure, and it is not usually the binding one. Every station publishes a voltage window and a current ceiling, and the array has to satisfy both.
|
Power station |
Published solar input window |
What that means in practice |
|
P1000 Plus |
Max 500W MPPT, 12V to 50V, 12A, XT60 |
Narrow voltage window, so check open-circuit voltage before wiring panels in series |
|
BP2000 |
Max 1,000W MPPT, 12V to 120V, 15A, XT60 |
Wide voltage window allows panels wired in series |
|
P5000 Pro |
Max 1,000W MPPT, 12V to 120V, 15A, XT60 |
Same window, sized for a larger base-camp array |
A worked example on one station. The P1000 Plus publishes a 500W ceiling across a 12V to 50V window at 12A. Our 400W portable solar panel lists 48V open-circuit and 12A short-circuit on MC4. Every figure fits, and OUKITEL sells the two together as a kit, but voltage and current both sit at the edge rather than comfortably inside.
Open-circuit voltage also rises as temperature drops, which is the direction cold-weather users are heading. Confirm the exact panel-to-station pairing rather than inferring compatibility from the numbers alone.
Keep Battery Storage Between the Panel and the Load
Panels generate in real time. They do not store anything. Starlink dislikes interruption, and a cloud crossing a directly connected array is an interruption that triggers a reconnect cycle.
Route solar into the battery and run the terminal from the battery. The battery buffers every dip in generation, which is why stable off-grid setups are solar plus storage rather than panels alone. Our off-grid solar generator tips go further into system layout.
Building a Reliable Off-Grid Starlink Power Setup
A dependable setup has four layers with different jobs. Sizing one well does not compensate for skipping another.
- Primary storage: enough usable watt-hours to survive the longest stretch with no charging source available, not the average stretch.
- Daytime generation: solar sized to replace consumed watt-hours, using realistic yield rather than the number printed on the panel.
- Backup input: a second recharge route for poor solar. The BP2000 accepts 12V/8A and 24V/10A car input, which turns a driving day into a charging day.
- Load priority: keep the connectivity budget separate from kettles, heaters and induction plates. One hot drink can cost more energy than an hour online.
There is also a reason to prefer battery storage over a fuel generator here. The CPSC reports that more than 200 people die each year in the United States from carbon monoxide produced by consumer products, with more than 100 of those deaths linked to portable generators. A battery station produces no combustion exhaust, which is what makes it usable inside a van, cabin, or tent where a fuel unit never is.

[IMAGE: Alt: Off-grid Starlink power setup with portable power station, solar panels and expansion battery beside an RV | 16:9]
Do Not Ignore the Cold-Weather Squeeze
Winter creates a double bind most buying guides skip. Starlink consumption climbs in cold conditions, and snow-melt heating adds more on top.
The battery side tightens at the same time, but the limits are not one number. Check the manufacturer's separate ranges for charging, discharging, and storage; a unit may be able to discharge in conditions where charging is blocked. Keep the station dry and sheltered, avoid charging below its stated floor, and size extra reserve for cold-weather losses.
Plan Recharging Before the Battery Reaches Empty
Compare Energy Used With Energy Recovered
A system is sustainable when recovery matches consumption across the operating cycle, not when the battery is large. Track the two as a daily pair and sizing stops being guesswork.
If consumption is 900Wh a day and realistic recovery is 700Wh, you lose 200Wh a day. A 2,048Wh battery absorbs that for about eight days, then the trip ends. The deficit rate tells you whether you need a bigger array, a second input, or a shorter stay.
Keep more than one recharge route on remote trips. Solar can be primary without being the only option. Vehicle charging while relocating, shore power at a campground, an AC top-up in town: redundancy on the input side is cheaper than redundancy on the storage side.
Understand Pass-Through, EPS, and Bypass
These terms are not interchangeable, and the specification that matters is often not the headline one. Transfer time describes how fast a unit switches to battery when input fails. The EPS or UPS wattage rating describes how much load it can carry through that switch, and it is frequently well below the inverter's continuous rating.
The BP2000 is a clear example. It delivers 2,200W of continuous inverter output but publishes a 1,400W EPS rating with a switchover under 10ms. For a Starlink terminal, that gap is irrelevant, since the load sits far below either figure. For a shared setup where the same station also carries a fridge or a pump, the EPS number is the one that governs what stays online through the transfer.
Check simultaneous charge and discharge separately. Not every unit supports it on every port.
What Should You Check Before Buying a Power Station for Starlink?
Five checks, in the order that actually decides the purchase.
- Usable capacity. Nameplate watt-hours times 0.85, measured against your runtime target plus reserve. This is the number that decides whether you stay online.
- Compatible outputs. The AC, DC, and USB-C ports your model needs, with wattage per port confirmed rather than assumed from the port shape.
- Solar and vehicle input. Enough permitted input, inside the published voltage and amp window, to recover a full day of consumption.
- Chemistry and thermal limits. Cycle life to 80 percent capacity, plus the published charge and discharge temperature range for your season.
- Monitoring, weight and expandability. A live watt and watt-hour display, a weight you will actually carry, and expansion only when the use case justifies it.
Notice what is missing from that list. Surge rating barely matters here, because a satellite terminal has no motor to start.
Common Starlink Power Sizing Mistakes
Four errors account for most of the disappointment, and all four are arithmetic rather than bad luck.
- Dividing nameplate watt-hours by load and calling it guaranteed runtime. That skips roughly 15 percent of the energy and all of the variability.
- Sizing for the terminal and forgetting the laptop. A laptop often draws more than the dish it is connected through.
- Buying inverter watts instead of battery watt-hours. Starlink needs very little continuous output, so a 3,000W inverter on a 600Wh battery solves the wrong problem.
- Expecting rated solar watts all day. Nameplate panel output is a test-condition figure, not daily production.

[IMAGE: Alt: Starlink power sizing mistakes chart comparing nameplate and usable watt-hours for a portable power station | 4:3]
Your Five-Step Starlink Power Plan
Work through these in order. Each step feeds the next, and the last one is the only real proof.
- Measure the load. Record the terminal and every supporting device during representative use, taken from the app reading or an inline meter rather than an internet average.
- Set the runtime target. Decide how many hours have to stay online with no recharge available, then add twenty to thirty percent for real conditions.
- Calculate capacity and check output. Divide required delivered energy by 0.85, then confirm the continuous rating and the ports cover the whole load with the startup peak included.
- Size the recharge path. Compare daily consumption against realistic daily solar yield, and add a vehicle or shore-power route as a second option.
- Test before you depend on it. Run the actual setup for a full working period at home, then compare observed battery use against your prediction and adjust.
Browse our portable power stations to match a capacity tier to the numbers you just calculated, then pair it with a portable solar panel sized to your daily deficit. Check current pricing on the product page.

[IMAGE: Alt: Portable power station for Starlink charging from a folding solar panel at a remote off-grid work site | 16:9]
FAQs
What Size Portable Power Station Do I Need for Starlink?
Calculate the full daily load in watt-hours, not just the terminal's running watts. Add Starlink consumption, router or laptop use, inverter losses, and a 20 to 30 percent reserve. A 512Wh class unit suits short outages; a 960Wh unit is a minimum-fit day system for a Mini plus light device use; 2,048Wh or more is the safer class for a full workday, winter use, or uncertain recharge.
Can Any Portable Power Station Run Starlink?
Yes, if the station provides an output your Starlink model officially supports and that output meets the required voltage, current, and wattage.
No, if you are relying on port shape alone, an unverified adapter, or a power bank that cannot negotiate the required USB Power Delivery profile.
How Many Watt-Hours Do I Need for Eight Hours of Starlink?
Multiply the measured average draw by eight, then divide by about 0.85 for conversion losses and add reserve. At 25W, eight hours starts around 235Wh before reserve; at 50W, it starts around 471Wh; at 100W, it starts around 941Wh. Size from the upper end when the connection is critical.
Can Solar Panels Run Starlink All Day?
They can, but only when daily solar recovery keeps pace with daily consumption. Check all four conditions:
- The array can replace the watt-hours used in a realistic day of sun.
- Panel voltage and current stay inside the station's MPPT input window.
- The battery is large enough to bridge clouds, shade, and overnight use.
- You have a second recharge route when solar production falls short.
If any one of those conditions fails, solar extends runtime rather than making the system self-sustaining.
Is USB-C More Efficient Than AC for Running Starlink?
It can be because it avoids running the AC inverter, but compatibility comes first. For Starlink Mini, Starlink specifies a 100W USB PD source at 20V/5A with its USB-C-to-barrel-jack cable; 65W or lower will not work. Use the requirement published for your exact hardware rather than assuming every USB-C port is suitable.
How Does Cold Weather Change Starlink Runtime?
Cold weather can raise terminal consumption, especially when snow-melt heating activates, while battery performance may tighten. Check three separate limits on the power station: charging temperature, discharging temperature, and storage temperature. If the forecast approaches any published limit, keep the station dry and sheltered, increase the energy reserve, and do not charge below the manufacturer's stated floor.
Sources
- Federal Emergency Management Agency (FEMA), Power Outages
- U.S. Energy Information Administration (EIA), Where Solar Is Found
- U.S. Consumer Product Safety Commission (CPSC), Carbon Monoxide Information Center
- U.S. Environmental Protection Agency (EPA), Used Lithium-Ion Batteries
- Federal Communications Commission (FCC), Getting Broadband Q&A


Looking for something else?

Portable Power Station for Freezer Backup: Runtime by Size and Temperature
LEARN MORE
Portable Power Station for a Sump Pump: Starting Watts, Runtime and Setup
LEARN MORE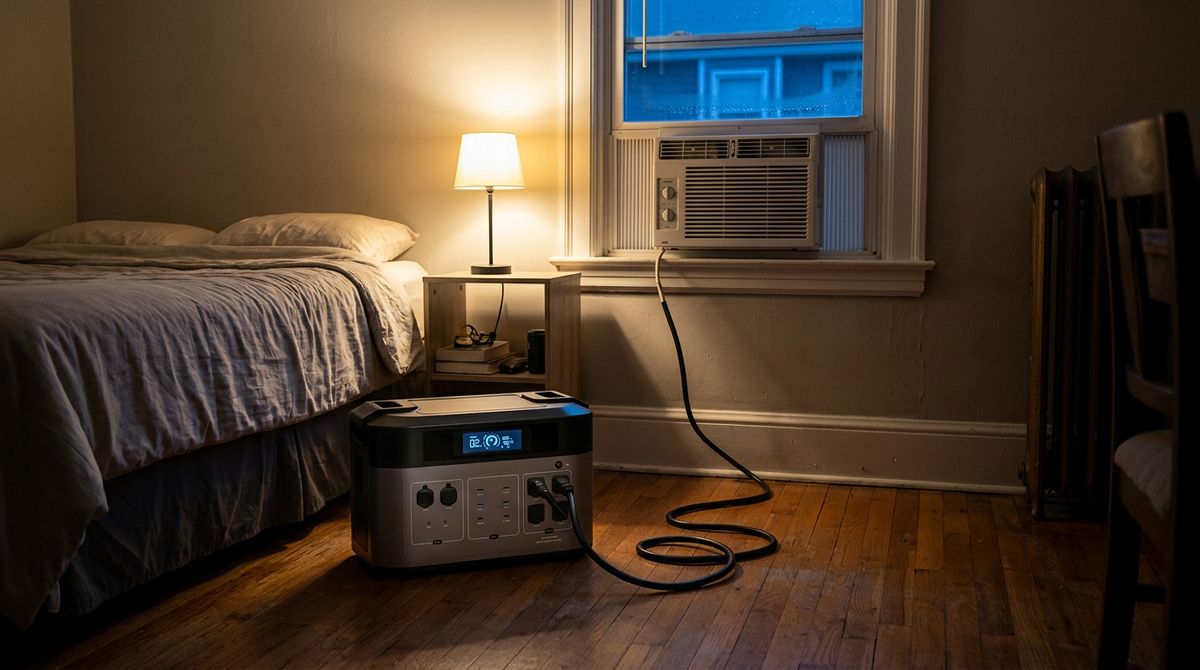
Can a Solar Generator Run a Window Air Conditioner? Size and Runtime Guide
LEARN MORE
Hurricane, Wildfire and Winter Outage Power Checklist
LEARN MORELooking for something else?

OUKITEL Showcases Energy Storage Solutions at Intersolar South America 2026, Accelerating Expansion into Latin America
LEARN MORE
Portable Power Station for Starlink: Runtime, Solar and Off-Grid Setup
LEARN MORE
Portable Power Stations for Power Tools and Job Sites: Surge, Runtime and Safety
LEARN MOREYou may also like

OUKITEL BP5000 PRO MAX Portable Power Station 5000W | 5120Wh
OUKITEL BP2000 PRO Portable Power Station 3300W

OUKITEL C01 Car Jump Starter 1350A | 80Wh | PD60W

OUKITEL BP3000 Portable Power Station 3200W | 2048Wh

OUKITEL P2001 Plus+400W Solar Generator

OUKITEL P2001 Plus+2*200W Solar Generator
Further reading

OUKITEL P2001 Plus vs BLUETTI AC200L: Which 2kWh Station Is Better for You?

OUKITEL P2001 Plus vs EcoFlow DELTA 2 Max: 2048Wh Power Station Comparison
